Live Chat Software by Kayako |
Note These steps are applicable to the operating systems that are mentioned in the "applies to" section. These steps do not apply to Windows Vista, Windows Server 2008, Windows Server 2008 R2, or Windows 7.
1. Rename the %WinDir%\System32\Clbcatq.dll file to %WinDir%\System32\~Clbcatq.dll. Make sure that you include the tilde (~) at the start of the file name.
2. Stop the COM+ Event System service and set the Startup type to Manual or Disabled to prevent it from starting on restart. For more information about the COM+ Event System service, please visit the following Microsoft TechNet Web site:
http://technet.microsoft.com/en-us/library/cc778262(WS.10).aspx (http://technet.microsoft.com/en-us/library/cc778262(WS.10).aspx)
3. Restart the computer.
4. Start Registry Editor (Regedt32.exe).
5. Locate and delete the following key in the registry:
HKEY_LOCAL_MACHINE\SOFTWARE\Microsoft\COM3
6. At a command prompt, type cd %windir%, and then press ENTER.
7. At a command prompt, type rmdir /s Registration, and then press ENTER. This is the location folder of the registration database.
Note If you have MS04-012 installed, you must now re-install MS04-012. For more information about security update MS04-012, click the following article number to view the article in the Microsoft Knowledge Base:
828741 (http://support.microsoft.com/kb/828741/ ) MS04-012: Cumulative Update for Microsoft RPC/DCOM
8. Click the Start button, point to Settings, and then click Control Panel.
9. Double-click Add/Remove Programs, and then click Add/Remove Windows Components.
10. Click Next to go through the reinstallation process, to reinstall COM+.
11. If IIS is installed on the computer, IIS creates several COM+ applications. These applications will now be missing. To re-create these applications, run the following command at a command prompt:
rundll32 %windir%\system32\inetsrv\wamreg.dll, CreateIISPackage
If Windows File Protection blocks the renaming and deletion, restart the computer in Safe mode, and follow these steps again.
APPLIES TO
* Microsoft Windows Server 2003, Enterprise Edition (32-bit x86)
* Microsoft Windows Server 2003, Standard Edition (32-bit x86)
* Microsoft Windows XP Professional
* Microsoft Windows 2000 Server
* Microsoft Windows 2000 Advanced Server
* Microsoft Windows 2000 Professional Edition
How to analyze the log file entries that the Microsoft Windows Resource Checker (SFC.exe) program
INTRODUCTION
MORE INFORMATION
Overview
You can use the SFC.exe program to help you troubleshoot crashes that occur in the user mode part of Windows Vista. These crashes may be related to missing or damaged operating system files.The SFC.exe program performs the following operations:
- It verifies that non-configurable Windows Vista system files have not changed. Also, it verifies that these files match the operating system's definition of which files are expected to be installed on the computer.
- It repairs non-configurable Windows Vista system files, when it is possible.
How to analyze the log file that the SFC.exe program generates
How to view the log file
The SFC.exe program writes the details of each verification operation and of each repair operation to the CBS.log file. Each SFC.exe program entry in this file has an [SR] tag. The CBS.log file is located in the %windir%\Logs\CBS folder.Note The Windows Modules Installer service also writes to this log file. (The Windows Modules Installer service installs optional features, updates, and service packs.)
You can search for [SR] tags to help locate SFC.exe program entries. To perform this kind of search and to redirect the results to a text file, follow these steps:
- Click Start
 , type cmd in the Start Search box, right-click cmd in the Programs list, and then clickRun as administrator.
 If you are prompted for an administrator password or for a confirmation, type your password, or click Continue.
 - Type the following command, and then press ENTER:
findstr /c:"[SR]" %windir%\logs\cbs\cbs.log >sfcdetails.txt
How to interpret the log file entries
The SFC.exe program verifies files in groups of 100. Therefore, there will be many groups of SFC.exe program entries. Each entry has the following format:<date> <time>, Info CSI 00000006 [SR] Verifying 100 (0x00000064) components <date> <time>, Info CSI 00000007 [SR] Beginning Verify and Repair transaction <date> <time>, Info CSI 00000009 [SR] Verify complete <date> <time>, Info CSI 0000000a [SR] Verifying 100 (0x00000064) components <date> <time>, Info CSI 0000000b [SR] Beginning Verify and Repair transaction <date> <time>, Info CSI 0000000d [SR] Verify complete <date> <time>, Info CSI 0000000e [SR] Verifying 100 (0x00000064) components <date> <time>, Info CSI 0000000f [SR] Beginning Verify and Repair transaction <date> <time>, Info CSI 00000011 [SR] Verify complete <additional entries> <additional entries> <date> <time>, Info CSI 00000011 [SR] Verify complete
<date> <time>, Info   CSI    00000006 [SR] Verifying 100 (0x00000064) components
<additional entries>
<additional entries>
<date> <time>, Info   CSI    00000007 [SR] Beginning Verify and Repair transaction
<date> <time>, Info   CSI    00000008 [SR] Repairing corrupted file [ml:520{260},l:108{54}]"\??\E:\Program Files\Common Files\Microsoft Shared\DAO"\[l:20{10}]"dao360.dll" from store
<date> <time>, Info   CSI    0000000a [SR] Verify complete
The following table lists other messages that may be logged in the SFC.exe program entries of the CBS.log file after verification is completed.
| Entry | Example | Explanation |
| Cannot repair member file file details | Cannot repair member file [l:14{7}]"url.dll" of Microsoft-Windows-IE-WinsockAutodialStub, Version = 6.0.5752.0, pA = PROCESSOR_ARCHITECTURE_INTEL (0), Culture neutral, VersionScope = 1 nonSxS, PublicKeyToken = {l:8 b:31bf3856ad364e35}, Type neutral, TypeN | This entry indicates that the file content does not match the operating system definition for the file. In this situation, the SFC.exe program cannot repair the file. |
| Repaired file file detailsby copying from backup | Repaired file \SystemRoot\WinSxS\Manifests\\[ml:24{12},l:18{9}]"netnb.inf" by copying from backup | This entry indicates that a problem exists with a file. The SFC.exe program can repair this file by copying a version from a private system store backup. |
| Repairing corrupted file [ml:520{260},l:36{18}]"\??\C:\Windows\inf"\[l:18{9}]"netnb.inf" from store | Repairing corrupted file [ml:520{260},l:36{18}]"\??\C:\Windows\inf"\[l:18{9}]"netnb.inf" from store | This entry indicates that a problem exists with a file. The SFC.exe program can repair this file by copying a version from the system store. |
Refresh your PC Fixes software problems by reinstalling the OS while preserving the user data, user accounts, and important settings. All other preinstalled customizations are restored to their factory state. In Windows 10, this feature no longer preserves user-acquired Windows apps.
Reset your PC prepares the PC for recycling or for transfer of ownership by reinstalling the OS, removing all user accounts and contents (e.g. data, Classic Windows applications, and Universal Windows apps), and restoring preinstalled customizations to their factory state.
The options above are great for what they are intended for, but you could also do a repair install of Windows 10 by performing an in-place upgrade without losing anything other than all installed Windows Updates.
This tutorial will show you how to do a repair install of Windows 10 by performing an in-place upgrade without losing anything.
You must be signed in as an administrator to be able to do a repair install of Windows 10.
- You will only be able to do a repair install of Windows 10 from within Windows 10. You will not be able to do a repair install at boot or in Safe Mode.
- You will need at least around 8.87 GB + what Windows is currently using of free space available on the Windows drive.
- The installation media (ex: ISO or USB) must be the same edition and build as your currently installed Windows 10. If it's not, then the repair install will fail.
- The installation media (ex: ISO or USB) must be the same language as your currently installed Windows 10. If it's not, then you will not keep anything.
- If you have a 32-bit Windows 10, then you must use a 32-bit ISO or USB.
- If you have a 64-bit Windows 10, then you must use a 64-bit ISO or USB.
- System Protection will be reset to the default of being turned off. It is recommended to turn on system protection after the repair install has finished to have restore points.
- You will lose any custom fonts.
- You will lose any customized system icons.
- You may need to re-establish your Wi-Fi connection.
- You will need to redo Windows updates subsequent to the build you have used for the repair install.
- Windows.old will be created.
- You will need to redo any language downloads including the display language if you changed that.
----------------------------------------------------------------------------------------------------------------------------------------------------------------------
Here's How:
1. Sign in to an administrator account in Windows 10.
2. If you have not already, you will need to disable or uninstall any 3rd party AV or security program you have installed first to prevent it from interfering with the upgrade to Windows 10. You can reinstall it after Windows 10 has finished installing.
3. Do the step below depending on what you are using to do a repair install of Windows 10 with.
- step 4: To do a repair install of Windows 10 with an ISO file
- step 5: To do a repair install of Windows 10 with USB installation media
- step 6: To do a repair install of Windows 10 with Get Windows 10 (GWX) app
- step 7: To do a repair install of Windows 10 with Media Creation Tool.
A) If you have not already, you will need to download a Windows 10 ISO file.
B) Mount the ISO file.
C) Run the setup.exe file to start Windows 10 Setup.
A) If you have not already, you will need to create a Windows 10 installation USB flash drive.
B) Connect and open the USB flash drive, and run the setup.exe file to start Windows 10 Setup. (see screenshot below)
C) If prompted by UAC, click/tap on Yes.
D) Go to step 8 below.
A) Click/tap on the Download button below to go to Microsoft, and click/tap on the top Upgrade now button at Microsoft's site.
B) Save the GetWindows10-sds_____________.exe file to your desktop, and run it.
C) If prompted by UAC, click/tap on Yes.
D) Windows 10 will now start downloading. Go to step 10 below.
A) Click/tap on the Download button below to go to Microsoft, and click/tap on the bottom Download tool now button at Microsoft's site.
B) Save the MediaCreationTool.exe file to your desktop, and run it.
D) If prompted by UAC, click/tap on Yes.
E) Click/tap on Accept for the license terms. (see screenshot below)
F) Select (dot) Upgrade this PC now, and click/tap on Next. (see screenshot below)
G) Windows 10 will now start downloading. Go to step 10 below.
8. Windows 10 Setup will now start preparing. (see screenshot below)

9. Select (dot) Download and install updates, and click/tap on Next. (see screenshot below)
10. Windows 10 Setup will now start getting things ready. (see screenshots below)
11. Click/tap on Accept for the license terms. (see screenshot below)
12. Windows 10 Setup will now check for and install any available updates, and make sure you're ready to install. (see screenshots below)
13. When ready, click/tap on Install to start the repair install of Windows 10. (see screenshot below)

 If you don't have Keep personal files and apps selected, you will not keep everything.
14. Windows 10 Setup will now start the in-place upgrade to repair install Windows. (see screenshots below)
15. When it's ready, click/tap on Next. (see screenshot below)
16. Click/tap on Use Express settings or Customize settings for how you want to set these settings, and go to step 20 (Use express settings) orstep 17 (Customize settings) below. (see screenshot below)
17. Turn On or Off the Personalization and Location settings you would like, and click/tap on Next. (see screenshot below)
18. Turn On or Off the Browser and protection and Connectivity and error reporting settings that you want, and click/tap on Next. (see screenshot below)
19. Click/tap on Next. (see screenshot below)
20. You can now sign in to Windows 10. (see screenshots below)
- A System Restore did not help fix your Windows 7.
- There is no other easier option left that can fix your Windows 7.
- You DO NOT want to do a Clean reinstall of Windows 7.
- You DO want to preserve your user accounts, data, programs, and system drivers.
- Sounds
- Services
- Visual Effects Settings
- Device Drivers - Be sure to have these handy to reinstall. They do not always remain after the repair (upgrade) install.
- You may lose the ability to sign on to MSN Messenger, to solve this problem have a look at this threadUnable to sign in to WLM.
- You may lose your custom themes due to not having permisions set on the old themes. Go to thehidden themes folder at C:/Users/(User-Name)/AppData/Local/Microsoft/Windows/Themes, then Take Ownership of the themes folder and you will now have all your themes back.
- It has been reported that you may also lose your Media Center gadget after doing the repair install.
- Windows Updates will need to be checked and reinstalled again.
- You can only do a repair install with the same edition Windows 7 installation disc for the same edition of Windows 7 that you have installed.
- You cannot use a OEM Windows 7 "Factory" Restore/Recovery type of installation disc that came with or created from a store bought computer to do a repair install with. These can only be used do a clean install instead.
- You can do a repair install on a factory OEM installation with the latest official Windows 7 with SP1ISO file here: Microsoft: Windows 7 Direct Download Links, and use Windows 7 USB-DVD Download Tool to create a bootable DVD or USB flash drive with the ISO to do the repair install from within Windows 7.
- You can use a retail OEM Windows 7 installation disc to do a repair install with.
- You can use a retail (full or upgrade) Windows 7 installation disc to do a repair install with.
- You cannot do a repair install with a System Repair Disc. A System Repair Disc is not a installation disc, and will only boot to the System Recovery Options screen.
- If you have a 32-bit (x86) Windows 7 currently installed, then you must use a 32-bit Windows 7 installation disc to be able to do a repair install with.
- If you have a 64-bit (x64) Windows 7 currently installed, then you must use a 64-bit Windows 7 installation disc to be able to do a repair install with.
- You can use a retail Windows 7 SP1 installation disc (ex: Technet (available), MSDN (available), or retail (when available)) to do a repair install with on a currently installed Windows 7 SP1.
- You can use a Windows 7 SP1 installation disc (ex: Technet (available), MSDN (available), or retail (when available)) to do a repair install with on a currently installed slipstream Windows 7 SP1.
- You cannot use a slipstream Windows 7 installation disc to do a repair install with on a currently installed Windows 7 SP1.
- You cannot use a slipstream Windows 7 installation disc to do a repair install with on a currently installed slipstream Windows 7 SP1.
- You can only do a repair install from within Windows 7.
- You cannot do a repair install at boot or in Safe Mode.
- You must be logged into Windows 7 in a administrator account to be able to do a repair install.
- You must have at least 8.87 GB + what is currently being used of free space (more if you have a larger installation) on the hard drive/partition Windows 7 is installed on to do a repair install.
- If you changed the default location of a user account's profile folder, then you will need to change it back to the default C:\Users location first.
- If you moved the default location of a user folder, then you will need to change it back to the default C:\Users\(user-name) location first.
Here's How:
NOTE: Be sure to back up anything that you do not want to lose first to be extra safe.
1. Start Windows 7, and log on to an administrator account.
2. Disable any 3rd party firewall, antivirus, or other security program to avoid it from possibly preventing the repair in-place upgrade installation of Windows 7.
3. Do either step 4, step 5, or step 6 below depending if your retail Windows 7 installation ISO/DVD/USB has SP1 or not, and if your currently installed Windows 7 has SP1 installed or not.
4. Repair Installed Windows 7 SP1 using Windows 7 with SP1 ISO
Note
If you do not have a Windows 7 with SP1 ISO, then you can download an official ISO with your retail product key from Microsoft at the link below.Microsoft Software Recovery
You can also download the latest official Windows 7 SP1 Media Refresh (SP1 U) ISO file at the link below, but this link is not always available for download.Microsoft: Windows 7 Direct Download Links
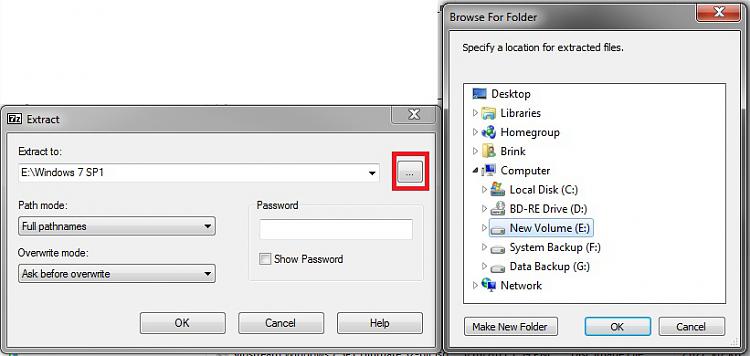
A) If you have not already, you will need to install a program like 7-Zip that supports extracting a ISO to a folder.5. Repair Installed Windows 7 SP1 using Windows 7 with SP1 DVD/USB
B) Using the program (ex: 7-Zip) from step 1, extract the Windows 7 SP1 ISO file to a folder on a partition or HDD other than the current Windows 7 partition. (see screenshot below)
NOTE: For example with 7-Zip, right click on ISO, click on 7-Zip, Extract files, browse button, select where you want to extract to, and click on OK twice.C) While in Windows 7 SP1, open the folder that you extracted the ISO into, and run the setup.exe file.
D) Go to step 7 below.
Note
If you do not have a Windows 7 with SP1 ISO, then you can download an official ISO with your retail product key from Microsoft at the link below.http://www.microsoft.com/en-us/software-recovery
You can also download the latest official Windows 7 SP1 Media Refresh (SP1 U) ISO file at the link below, but this link is not always available for download.Microsoft: Windows 7 Direct Download Links
Afterwards, you can use Windows 7 USB-DVD Download Tool to create a bootable DVD or USB flash drive with the ISO to do the repair install from within Windows 7 using this step.A) While in Windows 7 SP1, insert your retail Windows 7 SP1 installation DVD into the DVD drive, or connect yourWindows 7 with SP1 installation USB thumb drive, and click on the Run setup.exe option in AutoPlay. (see screenshot below)6. Repair Installed Windows 7 without SP1 using Windows 7 without SP1 DVD/USB
NOTE: If the AutoPlay window does not open, then open the drive folder in Computer and run the setup.exe file.B) Go to Go to step 7 below.
Note
If you do not have a Windows 7 without SP1 installation DVD/USB, then you can download the latest official Windows 7 Professional or Home Premium without SP1 ISO file here: Microsoft: Windows 7 Direct Download Links, and use Windows 7 USB-DVD Download Tool to create a bootable DVD or USB flash drive with the ISO to do the repair install from within Windows 7 using this step.
It is preferred to have SP1 installed on your PC and to use step 4 or step 5 above to do a repair install with instead though.A) While in Windows 7 SP1 installed, insert your retail Windows 7 installation DVD into the DVD drive, or connect your Windows 7 installation USB thumb drive, and click on the Run setup.exe option in AutoPlay. (see screenshot below)7. If prompted by UAC, then click on Yes.
NOTE: If the AutoPlay window does not open, then open the drive folder in Computer and run the setup.exe file.B) Go to Go to step 7 below.
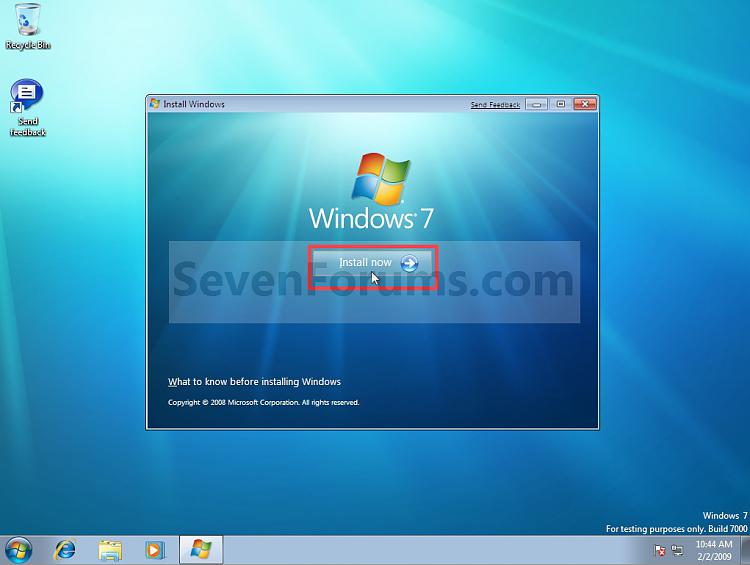
8. Click on the Install Now button to start the installation. (see screenshot below)9. If prompted, uncheck the I want to help make Windows installation better box (unless you would like to), and click on the Go online to get the latest updates for installation option. (see screenshot below)
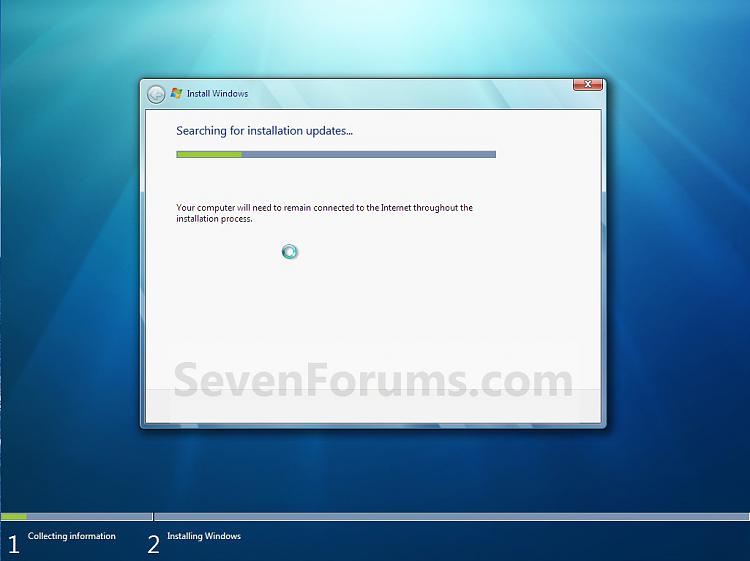
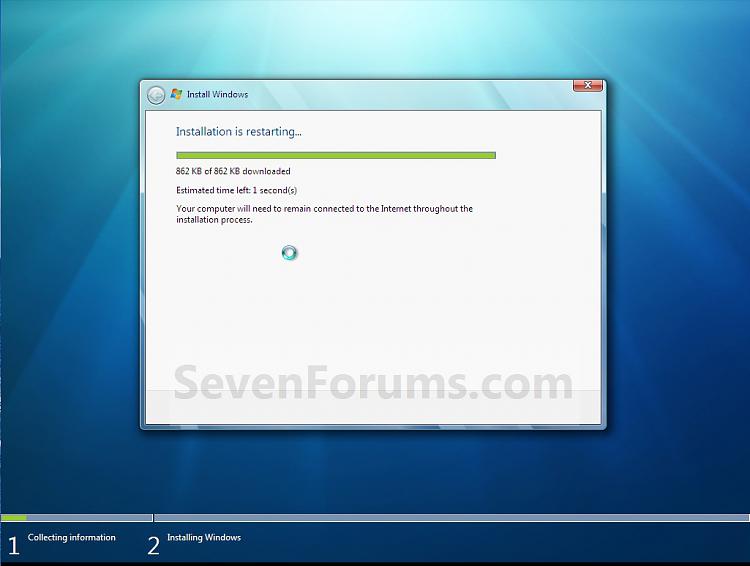
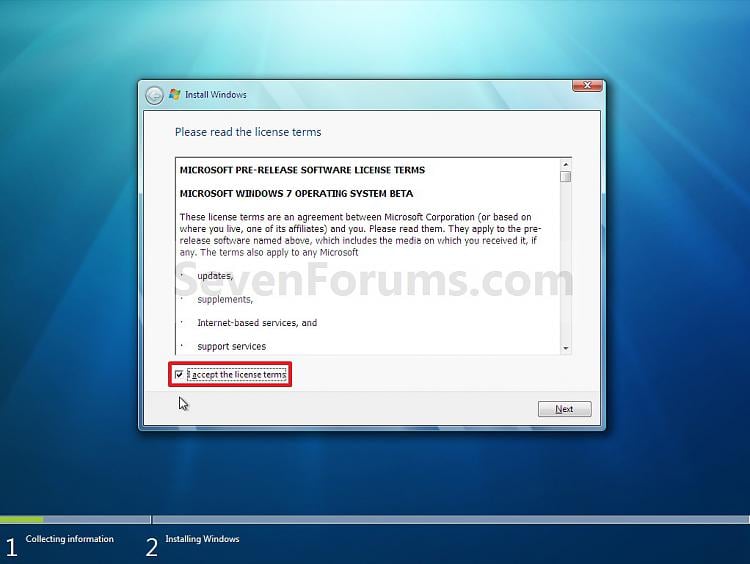
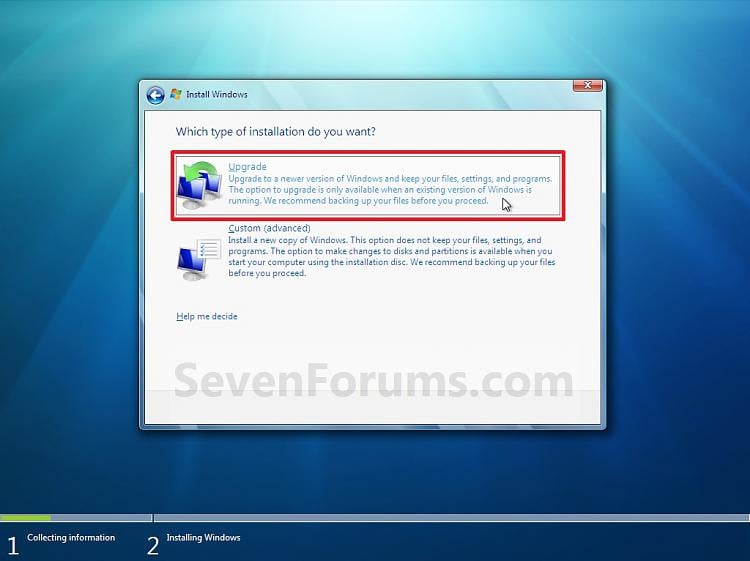
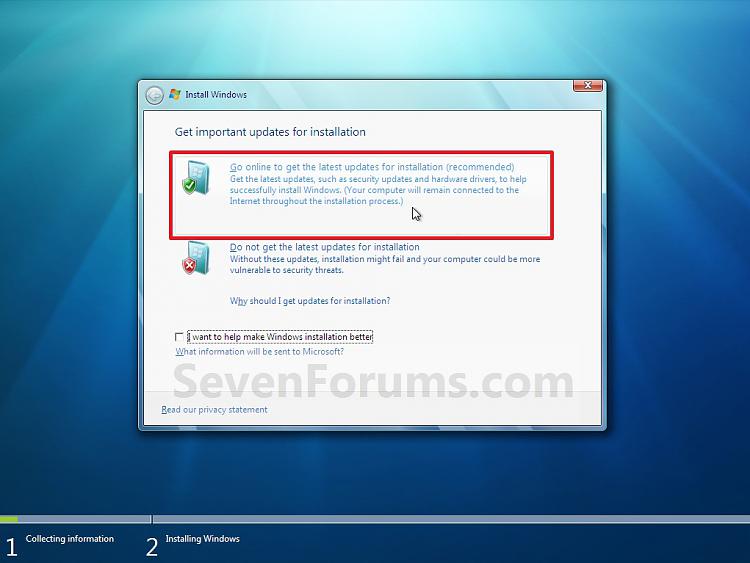 A) Windows 7 will now check online for and install any available installation updates. (see screenshots below)10. Check the I accept the license terms box, and click on Next. (see screenshot below)11. Click on the Upgrade option. (see screenshot below)
 12. Windows will now check for any compatibility issues. If any are found like in the example below, take care of them first then restart the repair install process over again.
 13. The installation of Windows 7 will now begin. (see screenshot below)
NOTE: During the installation process, your screen may flash and computer will restart a few times.14. After the final restart, you will see this screen for a moment. (see screenshot below)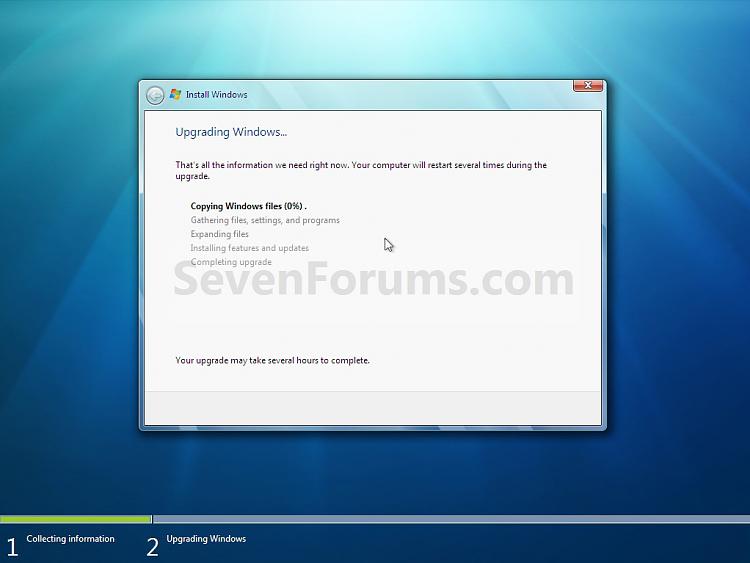 15. Type in your Windows 7 product key number. (see screenshot below step 16)
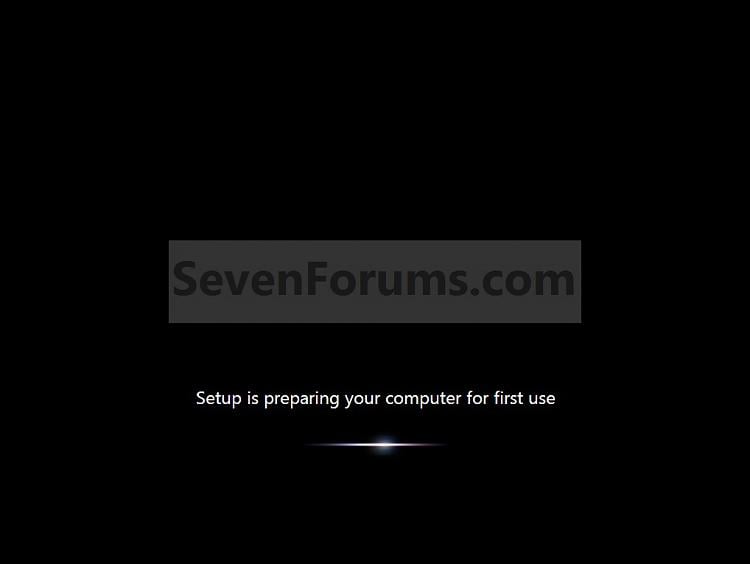
16. Uncheck the Automatically activate Windows when I'm online box unchecked, then click on the Next button. (see screenshot below)
NOTE: You can activate Windows 7 later after you make sure it is running properly. (see step 23 below)
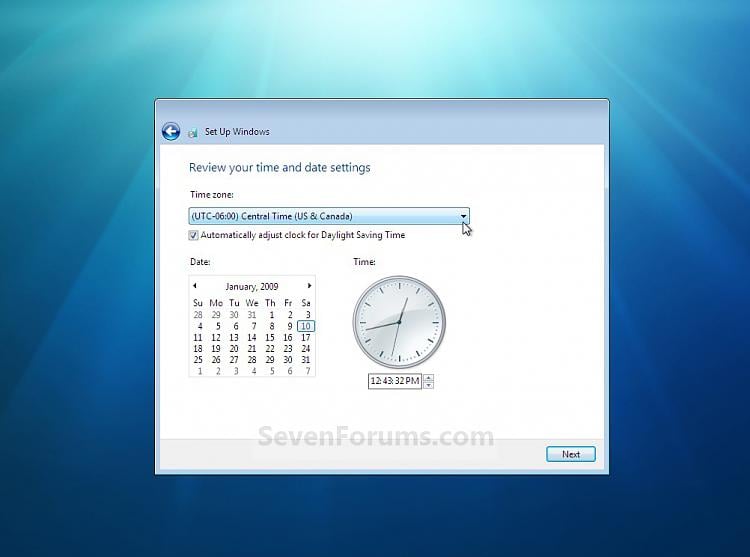
If you chose to automatically activate Windows online when you set up your computer, automatic activation begins trying to activate your copy of Windows three days after you log on for the first time.17. Click on Use recommended settings. (see screenshot below)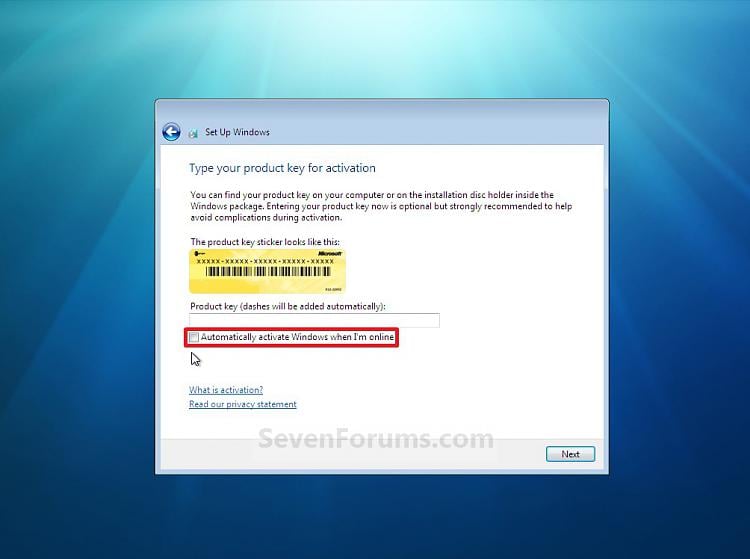 18. Select your time zone and set your time and date settings, then click on the Next button. (see screenshot below)
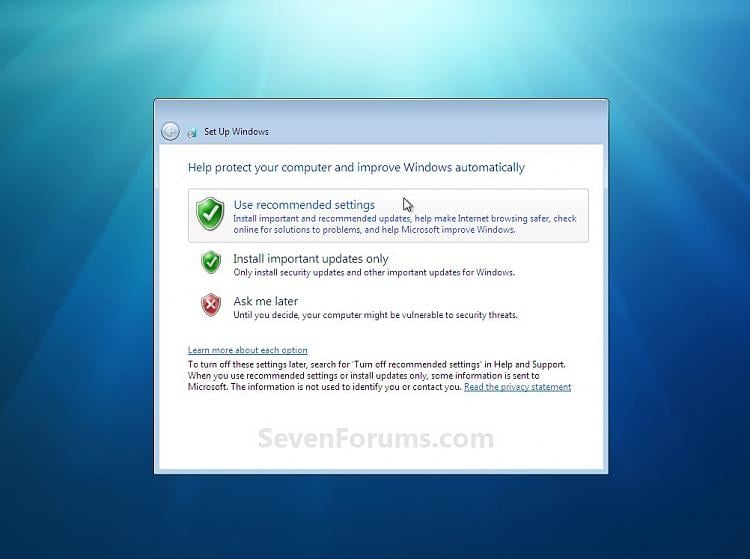 19. Click on the option for your computer's location to select the correct network location type settings to be applied for that location. (see screenshot below)
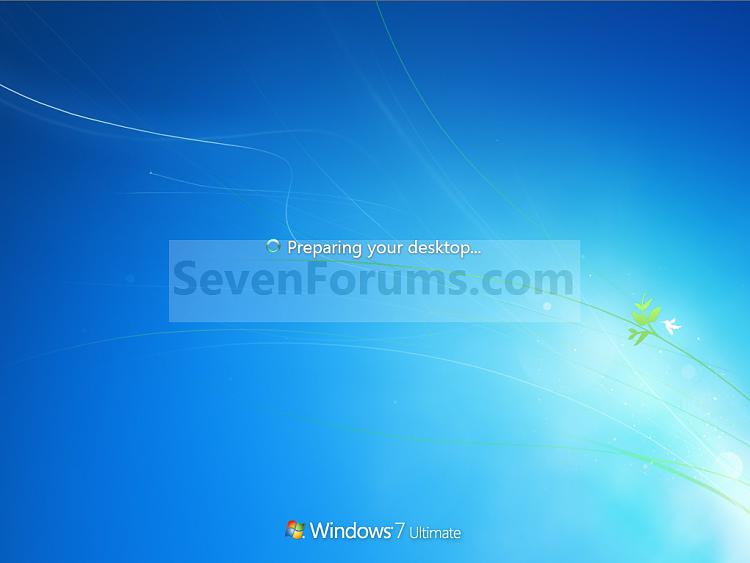
NOTE: It is best to select Public location for the best security.20. Windows 7 will now prepare your desktop to startup. (see screenshots below)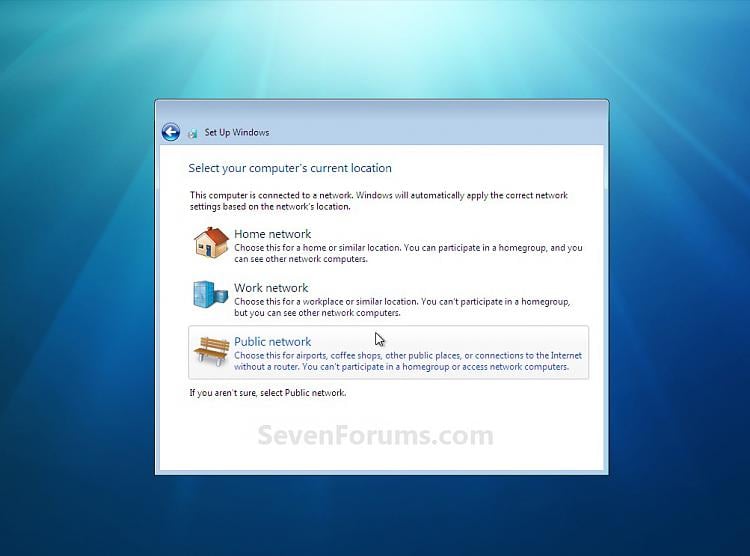 21. If you used a DVD or USB to do the repair install with, then you can remove the DVD or USB when the repair install has successfully completed and you are logged in to Windows 7.
22. Check to see if you are missing any user files. If you are, then you can copy them from the C:\Windows.old or thehidden protected operating system C:\$INPLACE.~TR and C:\WINDOWS.~Q backup folders. (see screenshot below)23. If everything checks out in step 21, then you can run Disk Cleanup (step 5 at this link). You will need to click on theClean up system files button first, and then could check the Files discarded by Windows upgrade, Previous Windows installations, and Windows upgrade log files boxes. (see screenshot below)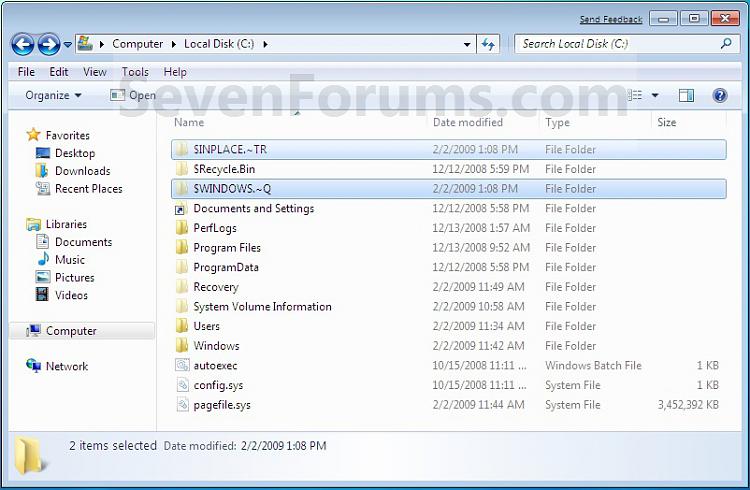
NOTE: This will delete the C:\Windows.old, C:\$INPLACE.~TR and C:\WINDOWS.~Q folders from step 21 above.24. Refresh your Windows Experience Index (WEI) score.
25. When finished, activate Windows 7, and make sure that your 3rd party security programs (if applicable) are enabled again.
Source: http://www.sevenforums.com/tutorials/3413-repair-install.html?ltr=R
When you reset your PC, it will basically give you a clean install (retail) or factory recovery (preinstalled OEM) of Windows 8 afterwards. You will lose everything from your current Windows 8 installation.
When you refresh your PC, this basically repairs Windows 8 by reinstalling it while keeping your files, Store apps, most of your settings, etc..... However, all installed 3rd party desktop apps will be removed. If you like, you could create a custom refresh image to not lose anything, but this will require creating new custom refresh images every so often to keep it updated to not lose anything since the last image was created.
This tutorial will show you how to do a repair install (aka: in-place upgrade install) to fix your currently installed Windows 8 without losing anything. For example, desktop apps.
You must be signed in as an administrator to be able to do a repair install of Windows 8.
- All user accounts.
- Files in all users' C:\Users\(user-name) folders. (ex: Desktop, My Documents, My Music, etc...)
- Wireless network connections.
- Apps from the Windows Store will be kept.
- All installed 3rd party desktop programs will be kept.
- Mobile broadband connections.
- BitLocker and BitLocker To Go settings.
- Windows Firewall settings.
- Drive letter assignments.
- File type associations set per user.
- Metro apps settings per user.
- Display settings.
- Personalization settings such as lock screen background and desktop wallpaper.
- All users' PC settings will be kept.
- Choices you made during Windows Welcome, such as computer name and user accounts, will not change.
- Network, Libraries, and Windows Update settings will not change.
- Customer Experience Improvement Program settings will not change.
- Windows Error Reporting settings will not change.
- Some drivers may or may not be removed, but usually will remain.
- Installed Windows Updates will be removed.
- Some drivers may or may not be removed, but usually will remain.
- You will only be able to do a repair install from within Windows 8.
- You will not be able to do a repair install at boot or in Safe Mode.
- You must have at least 8.87 GB + what is currently being used of free space on the hard drive/partition that Windows 8 is installed on. You may need more if you have a larger installation.
Be sure to back up anything that you do not want to lose before doing a repair install just to be extra safe. For example, if you lose power in the middle of doing the repair install.
Here's How:
1. Start Windows 8 or Windows 8.1, and sign in to an administrator account.
2. Disable any 3rd party firewall, antivirus, or other security program to avoid it from possibly preventing the repair in-place upgrade installation of Windows 8.
3. Do step 4 or 5 below depending on what you would like to use to do the repair install with.
4. If Using a Windows 8/8.1 DVD or USB to do a Repair Install with
- The DVD/USB you use must be for the same language as the Windows edition you currently have installed.
- If you have Windows 8 installed, then you must use a Windows 8 DVD/USB.
- If you have Windows 8.1 installed, then you must use a Windows 8.1 DVD/USB.
- If you have Windows 8.1 Update installed, then you must use a Windows 8.1 Update DVD/USB.
- If you have 32-bit Windows 8 installed, then you can only use a 32-bit Windows 8 DVD/USB.
- If you have 64-bit Windows 8 installed, then you can only use a 64-bit Windows 8 DVD/USB.
- If you installed 64-bit Windows 8 with UEFI, then you can only use a UEFI Windows 8 DVD/USB.
A) Insert/connect and open the DVD or USB, and go to step 6 below.
5. If Using a Windows 8/8.1 ISO file to do a Repair Install with
- The ISO you use must be for the same language as the Windows edition you currently have installed.
- If you have Windows 8 installed, then you must use a Windows 8 ISO.
- If you have Windows 8.1 installed, then you must use a Windows 8.1 ISO.
- If you have Windows 8.1 Update installed, then you must use a Windows 8.1 Update ISO.
- If you have 32-bit Windows installed, then you can only use a 32-bit Windows ISO.
- If you have 64-bit Windows installed, then you can only use a 64-bit Windows ISO.
- If you installed 64-bit Windows with UEFI, then you can only use a 64-bit Windows ISO.
A) Mount the ISO.
B) Open the mounted ISO from This PC if it didn't automatically open, and go to step 6 below.
6. Double click/tap on the setup file to run it. (see screenshot below)
7. If prompted by UAC, then click/tap on Yes.
8. If this is for Windows 8 Enterprise, then click/tap on Install now. (see screenshot below)

9. If prompted, select (dot) Download and install updates, and click/tap on Next (Windows 8/8.1 or Windows 8/8.1 Pro). (see screenshots below)
NOTE: If any updates are found, then they will be installed, and installation will restart and continue on to step 10.
10. Enter your product key that matches the installed edition of Windows, and click/tap on Next. (see screenshot below)
If you have a Windows 8 product key with Windows 8 installed, then you are good.
If you have a Windows 8.1 product key with Windows 8.1 or Windows 8.1 Update installed, then you are good.
If you have a Windows 8 product key with Windows 8.1 or Windows 8.1 Update installed, then you would need to enter a generic key below to install with, and change the product key later on in step 24 below to activate with your Windows 8 key instead.
If you have Windows 8 Enterprise, Windows 8. Enterprise, or Windows 8.1 Update Enterpriseinstalled, then you would need to change the product key later on in step 24 below to activate since Enterprise editions do not ask to enter a key at this step.
- Windows 8 (core): FB4WR-32NVD-4RW79-XQFWH-CYQG3
- Windows 8 Pro: XKY4K-2NRWR-8F6P2-448RF-CRYQH
- Windows 8 Pro with Media Center: RR3BN-3YY9P-9D7FC-7J4YF-QGJXW
- Windows 8.1 (core): 334NH-RXG76-64THK-C7CKG-D3VPT
- Windows 8.1 Pro: XHQ8N-C3MCJ-RQXB6-WCHYG-C9WKB
- Windows 8.1 Pro with Media Center: GBFNG-2X3TC-8R27F-RMKYB-JK7QT
- Windows 8.1 Enterprise: MNDGV-M6PKV-DV4DR-CYY8X-2YRXH OR FHQNR-XYXYC-8PMHT-TV4PH-DRQ3H
KMS setup keys (8/8.1): Appendix A: KMS Client Setup Keys
11. Check the I accept the license terms box, and click/tap on Accept (Windows 8 or Windows 8 Pro) or Next (Windows 8 Enterprise). (see screenshots below)
12. If this is for Windows 8 or Windows 8 Pro, then select (dot) Keep Windows settings, personal files, and apps, click/tap on Next, and go to step 14 below. (see screenshot below)
13. If this is for Windows 8 Enterprise, then click/tap on Upgrade: Install Windows and keep files, settings, and applications. (see screenshot below)

14. Windows 8 will now check for compatibility issues to see if you'll need to do anything to get your PC ready for Windows 8. If anything is found, you will need to take care of them before continuing. (see screenshot below)
15. If this is for Windows 8 or Windows 8 Pro and no issues were found from step 14 above, then click/tap on Install. (see screenshot below)
16. Windows 8 will now start to install. The computer will restart a few times during this. (see screenshots below)
NOTE: This will take a while to finish.
17. When Windows 8 is finished installing, select a color you like, and click/tap Next. (see screenshot below)
18. Click/tap on Use Express settings. (see screenshot below)
19. Do step 20 or 21 below depending on if your primary administrator account is a local account or Microsoft account.
20. If you have a Microsoft Account
A) Go to step 22 below.
21. If you have a Local Account
A) Enter the password for the displayed account, and click/tap on Next. (see screenshot below)
B) Click/tap on Skip, and go to step 22 below. (see screenshot below)
22. Windows 8 will now startup signed into your administrator account. (see screenshots below)
23. Use Disk Cleanup to delete at least the Previous Windows installation(s), Setup Log Files, Temporary Windows installation files, and Windows upgrade log files items to free up the large amount hard drive space that they take. (see screenshots below)
24. If you have an Enterprise edition or needed to use a generic key to install with from step 10 above, then you will need tochange the product key to be able to enter the product key and activate it. (see screenshots below)
25. Check for and install any available Windows Updates.
26. If needed, refresh or update you Windows Experience Index (WEI) score.


